
With over 15 years dedicated to counted cross stitch and hand embroidery, she has tested thousands of kits, threads, and fabrics.
Just opened your first embroidery kit and some terms still feel like a mystery? Skein, strand, chart, cross stitch, 14 count fabric… Embroidery has its own vocabulary, often mixed with English terms when the kit comes from a foreign brand. Our glossary will help you understand the main instructions in your kit so you can start your project with confidence.
What are the main types of embroidery?
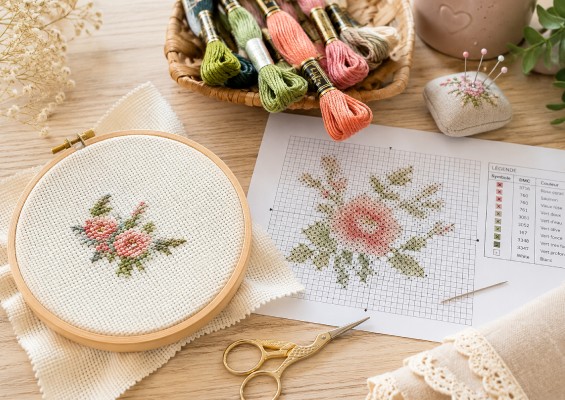
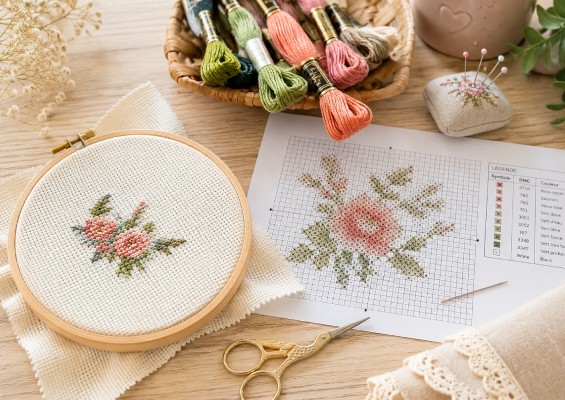
Before diving into the materials and instructions of your kit, it helps to understand how the design should be reproduced on the fabric. Depending on the type of embroidery chosen, you’ll need to follow a chart, cover a printed design, or use various decorative stitches.
The fabric is blank and the design is shown separately as a chart. You count the squares on the chart and transfer them onto the fabric to place each stitch in the right spot. This type of embroidery is most often worked in cross stitch.
In English: counted cross stitch.
Stamped or printed embroidery:
The design is printed directly onto the fabric. You simply follow the colors, symbols, or marked areas. Depending on the kit, the design may stay visible or wash out.
In English: stamped cross stitch, printed cross stitch, or pre-printed fabric.
What is surface embroidery?
Surface embroidery covers projects made with various decorative stitches, such as stem stitch, satin stitch, straight stitch, French knots, or chain stitch. The design is usually printed or traced onto the fabric, then each area is stitched using the technique given in the instructions. In English, this is called embroidery or surface embroidery.
What terms do you need to know to understand your fabric?
1 – Aida fabric:
Aida fabric is especially well suited to beginners. Its weave forms regular squares with clearly visible holes at each corner. It’s mainly used for cross stitch, with each cross stitch worked over a single square of fabric.
In English: Aida fabric or simply Aida.
2 – Linen fabric:
Linen fabric has a more natural, finer weave. Its threads are visible, but it doesn’t have squares as defined as Aida cloth. Stitching is usually done over two threads, which calls for extra care when counting.
Note: For linen fabrics, you may come across terms like Belfast, Newcastle, Dublin, Cashel, or Edinburgh. These names, specific to the Zweigart manufacturer, identify fabric ranges by their size. For example, Belfast refers to fabric with 12.6 threads/cm, or 32 count.
In English: linen or linen fabric.
3 – Evenweave:
Evenweave fabric has a regular weave. It gives a fine finish while often being easier to work with than linen. As with linen, stitching is usually done by counting the fabric threads.
Note: For evenweave fabrics, you may come across terms like Lugana, Murano, Modena, Bellana, or Britney. These names, specific to the Zweigart manufacturer, identify fabric ranges by their size. For example, Murano refers to fabric with 12.6 threads/cm, or 32 count.
In English: evenweave or evenweave fabric.
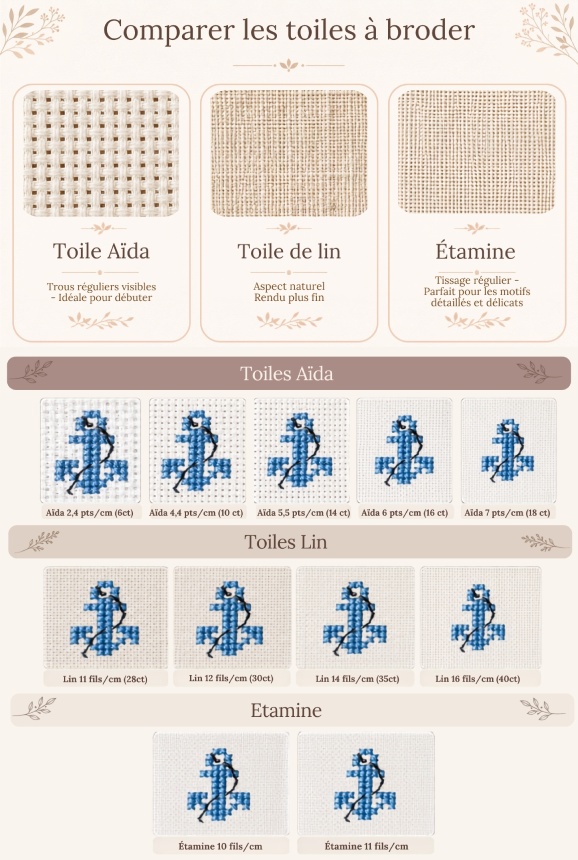
What does a fabric’s “count” mean?
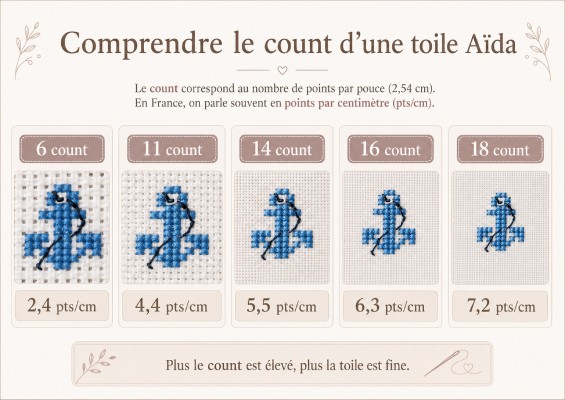
On kits from abroad, fabric fineness is often given in count. Count refers to the number of squares or threads per inch, i.e. 2.54 cm.
In France, we generally use stitches per centimeter, often shortened to pts/cm.
– 6 count is roughly 2.4 pts/cm.
– 10 or 11 count is roughly 4.4 pts/cm.
– 14 count is roughly 5.5 pts/cm.
– 16 count is roughly 6.3 pts/cm.
– 18 count is roughly 7.2 pts/cm.
The higher the count or stitches per centimeter, the smaller the fabric squares and the finer the finished embroidery.
Good to know:
For linen and evenweave, fineness is generally given in threads per centimeter. Fabric with 12.6 threads/cm is roughly 32 count. When stitched over two threads, it works out to about 6.3 stitches per centimeter.
What’s the vocabulary for embroidery thread?
1 – The skein:
A skein is the form in which embroidery thread is usually sold. Each color has a specific reference number. In some kits, the threads are supplied as pre-cut lengths, in the exact quantities needed for the project. In that case, the exact reference of each color isn’t always given.
In English: skein.
2 – Stranded cotton:
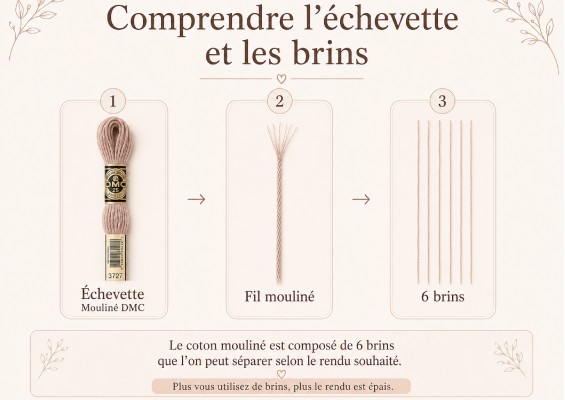
Stranded cotton is the thread most commonly used for cross stitch. It’s usually made up of six fine strands that can be separated. In France, the most popular stranded cotton is DMC’s Mouliné Spécial 117. Well known for its quality, it also comes in 500 color shades.
In English: embroidery floss or stranded cotton.
3 – The strand:
Each of the six threads making up stranded cotton is called a strand. So when the instructions say to stitch with two strands, you need to separate two threads out of the six that make up the skein.
Use 2 strands means “use 2 strands.”
Use 1 strand means “use 1 strand.”
Separate the strands means “separate the strands.”
Note: Depending on the brand and kit, the thread isn’t always stranded cotton and doesn’t always need separating into strands. Always check your kit’s instructions before you start.
Isabelle’s tip
A “thread length” is the length of thread you thread through your needle. To avoid knots, thread wear, or fraying while you work, we recommend cutting lengths of around 40 to 50 cm at most.
What are the main embroidery accessories?
Embroidery is a hobby that needs very few accessories when you’re starting out. That said, extra equipment can help improve both the quality of your finished pieces and your comfort while stitching.
The embroidery needle:
For cross stitch, a round-tipped needle is generally used. It slides through the holes in the fabric without damaging its threads. The eye is the small opening at the tip of the needle where the thread is inserted. There are many types of embroidery needles, chosen according to your fabric, thread, and stitch type.
In English:
– needle: needle;
– round-tipped needle: tapestry needle;
– eye of the needle: eye of the needle.
The embroidery hoop:
A hoop keeps the fabric taut while you work. It can help produce more even stitches, though it isn’t essential.
In English: embroidery hoop or simply hoop.
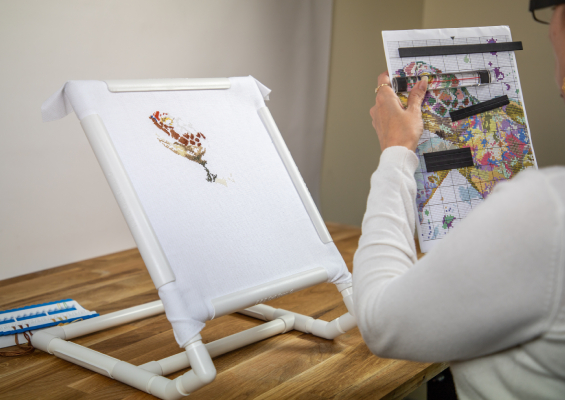
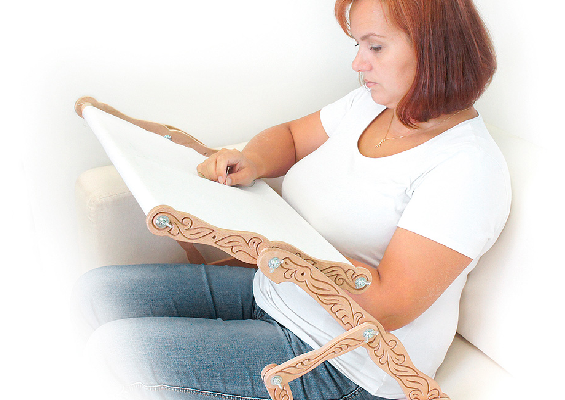
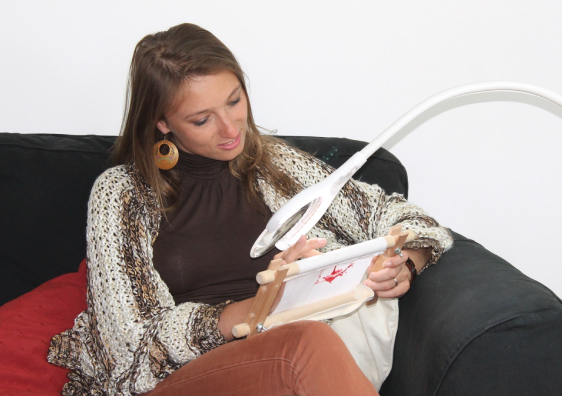
Note: other fabric-tensioning accessories exist too, such as Q-Snaps and embroidery frames/stands. They’re ideal for larger projects since they offer a bigger working surface. Frames and stands free up your hands while you sit on a sofa, at a table, or on a chair, making stitching more comfortable overall. Check out our full guide here..
Lamps and magnifying lamps:
Lamps and magnifying lamps aren’t essential accessories, but they greatly improve your comfort while stitching. Good lighting lets you work day or night while also protecting your eyesight in the long run. Daylight-simulating lamps are among the best tools for crafting, since they let you see colors accurately, without distortion. Check out our full guide here.
How do you read an embroidery chart?
The chart or pattern:
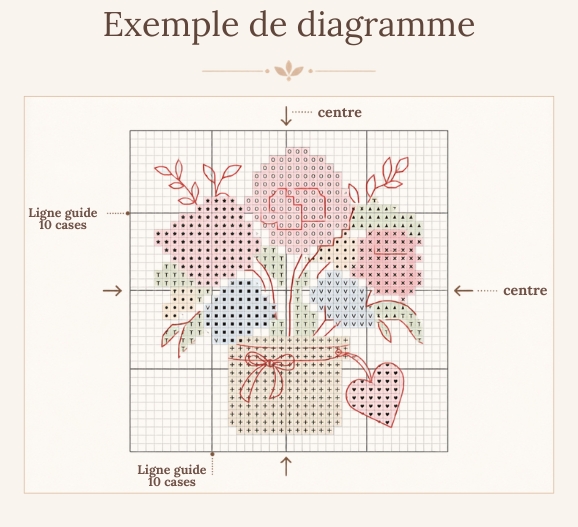
The chart shows the embroidery design as a grid of squares. For a cross stitch project, one square on the chart usually corresponds to one stitch on the fabric.
In English:
– grille: chart;
– diagramme or modèle: pattern;
– modèle de point de croix: cross stitch pattern.
The center of the chart:
The center of the chart is usually marked by arrows or guides along its edges. Finding the center of the chart and the center of the fabric helps you position the design correctly.
Charts often also have thicker lines every ten squares. These aren’t part of the design — they’re simply there to help you keep your place and count more easily.
How do you read the key and symbols?
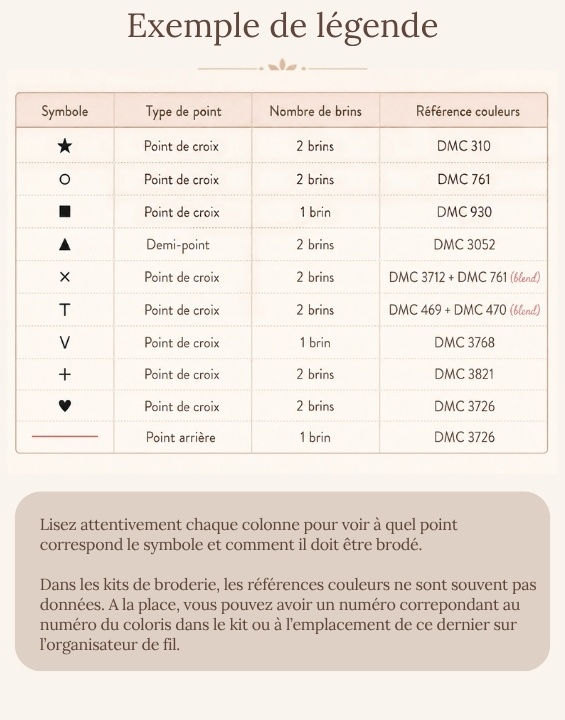
Each symbol on the chart represents a complete instruction, not just a color.
A symbol usually indicates:
– the type of stitch to use;
– the thread color or reference;
– the number of strands to use;
– possibly a blend of several colors.
So the same color can appear with several different symbols. It might, for example, be used with two strands for a main area, then with a single strand for a lighter effect.
Note: if a square has no symbol and is left blank, it means it shouldn’t be stitched.
In English, the key can be called a key, chart key, or legend.
How are backstitches shown?
Cross stitches are usually shown as symbols placed inside the squares.
Backstitches, used to outline details and add definition, are shown as lines drawn on the chart. These lines may connect two corners of squares, run across several squares, or trace the outline of an element of the design.
In English, this stitch is called a backstitch.
What are color blends?
Some charts call for blending two different colors in the same needle. To stitch with two strands, for instance, you might need to use one strand of one color and one strand of another. This blend, called a blend or blended threads in English, creates an in-between shade, a softer gradient, or a more natural effect.
Are charts always in color?
A chart can be printed in black and white or in color.
– On a black-and-white chart, symbols are used to tell threads apart.
– On a color chart, areas may also be colored to make reading easier. Do be careful, though: the colors printed on the chart don’t necessarily match the actual thread colors. Sometimes the colors used are deliberately different to create contrast between areas.
So always rely on the key first and check:
– the symbol;
– the thread reference;
– the number of strands;
– the stitch type given in the key.
What are the main embroidery stitches?
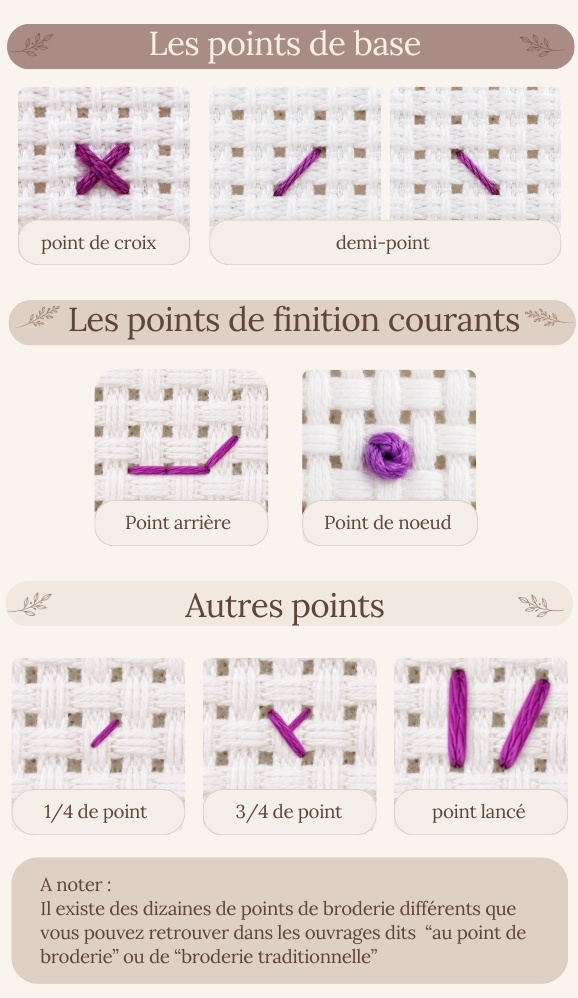
1 – Cross stitch:
Cross stitch is made up of two diagonals crossing to form an X. On Aida fabric, one cross stitch fills a single square, with the two diagonals passing through the four holes at its corners. For an even result, all the crosses should be worked in the same direction. ( Watch our video demo )
In English: cross stitch or full cross stitch.
2 – Half stitch:
A half stitch is a single diagonal of a cross stitch. It’s often used to create shading or backgrounds. Depending on the pattern, the half stitch may go in either direction, and sometimes both directions are used within the same design. Always check the instructions to see which direction your half stitch should go.
In English: half stitch or half cross stitch.
3 – Backstitch:
Backstitch forms a thin line used to outline details. It’s usually worked after the cross stitches, as a finishing step. It may also be called an outline stitch. ( Watch our video demo )
In English: backstitch.
4 – French knot:
The French knot creates a small round raised dot. It’s often used for eyes, flower centers, or small details. ( Watch our video demo )
In English: French knot.
Some patterns also use quarter stitches, three-quarter stitches, or straight stitches to add extra precision to the design.
What English terms come up often in kits?
Techniques and stitches:
Counted cross stitch: counted cross stitch.
Stamped cross stitch: stamped or printed cross stitch.
Full cross stitch: full cross stitch.
Half stitch: half stitch.
Backstitch: backstitch.
French knot: French knot.
Stitch type: stitch type.
Materials and instructions:
Fabric: fabric.
Floss: embroidery thread.
Skein: skein.
Strand: strand.
Blend: color blend.
Chart: chart.
Finished size: size of the finished piece.
Start in the center: start in the center.
Fasten off: fasten off the thread.
Do not knot the thread: do not knot the thread.
Our tips before you start
Before making your first stitches, take the time to identify the type of embroidery, check the fabric and its fineness, then look over each column of the key. Note the stitch type, the number of strands, any color blends, and the center of the chart. Embroidery vocabulary can seem technical at first, but it quickly becomes familiar. With a few simple landmarks, you’ll better understand your kits and work through your projects with more confidence.
Ready to get started? Check out our selection of ideal kits for beginners!
And if you ever have a doubt or question, our customer service team is here to help.
Enjoyed this article?
Share it with your friends and family
Discover our other articles
You haven’t seen everything yet!
-
 tutorial How to , Embroidery
How do you do counted cross stitch embroidery?
February 24, 2025
-
 frame Buying guide , Tips and tricks
Which embroidery frame should you choose?
August 19, 2024
-
 magnifying lamp Buying guide , Tips and tricks
Which lamp or magnifying lamp should you choose?
June 28, 2024


